
CHAPTER 01 OF 8
Connect a business with OAuth
Register your app once. Ask each ServiceKeel business to approve its own connection, then keep that business’s credentials on your server.
1. Create your developer account and app
Open ServiceKeel Developers, choose Start building, and create a developer account. Complete your company profile in the developer portal, then choose Create an app.
Register your app name, description, and exact HTTPS callback URI. When developing locally, use the ngrok callback described in the next section. Select field_service:read and field_service:write, then save the displayed client ID and secret in your server’s secret store.
Draft and submitted apps can be tested in the developer’s own account. Submit the integration for review before onboarding a separate business. The test’s synthetic approval route is not a public API.
The business must have the required ServiceKeel product access. Its verified owner or administrator completes consent. Your app never asks for their ServiceKeel password.
| Environment | Portal | REST API |
|---|---|---|
| Production | https://servicekeel.com | https://api.siteseam.com |
Use these production ServiceKeel URLs during development too. The API uses the shared SiteSeam host shown in the API reference. Keep PORTAL_ORIGIN and API_ORIGIN separate in your configuration.
2. Use ngrok for local OAuth development
When developing locally, you need to use ngrok to provide a public HTTPS callback for the OAuth connection. ServiceKeel sends the browser back to that callback after consent, and ngrok forwards the request to your application running on your computer. Your application still connects to the production ServiceKeel portal and API listed above.
- Start your application server. Install ngrok and connect its agent to your account using the official ngrok setup guide.
- Run
ngrok http 4190in another terminal, replacing4190with your application’s listening port. Keep the tunnel running throughout the connection. - Copy the HTTPS forwarding URL ngrok displays and append
/oauth/callback. Register that exact callback URI on your OAuth app and set your application’sSERVICEKEEL_REDIRECT_URIto the same value. - Configure your application’s public/base URL and allowed host/origin settings for the ngrok HTTPS origin. Open the application through that ngrok URL before starting OAuth so the callback receives the same session cookie and state. Use secure, HttpOnly session cookies that support the top-level OAuth callback.
The authorization request and token exchange must both send the same registered redirect_uri, including its scheme, hostname, path, and trailing slash. If your ngrok URL changes, update the app registration and your configuration, then start a new connection. When you deploy your application, register its deployed HTTPS callback instead.
3. Send the business to the consent screen
Generate a cryptographically random state and an S256 PKCE verifier for each connection attempt. Store them in a short-lived, one-use server session associated with the signed-in user of your application. Redirect the browser to the portal URL below. ServiceKeel displays the app and its requested permissions.
import { randomBytes, createHash } from 'node:crypto';

const PORTAL_ORIGIN = 'https://servicekeel.com';
const API_ORIGIN = 'https://api.siteseam.com';
// During development: ngrok's HTTPS forwarding URL + /oauth/callback.
// Register this exact value on your OAuth app before starting a connection.
const redirectUri = process.env.SERVICEKEEL_REDIRECT_URI;
if (!redirectUri || new URL(redirectUri).protocol !== 'https:') {
  throw new Error('Configure the registered HTTPS OAuth callback');
}
const verifier = randomBytes(32).toString('base64url');
const state = randomBytes(32).toString('base64url');
// Persist { verifier, state, createdAt, redirectUri } in this user's session.
const query = new URLSearchParams({
  client_id: process.env.SERVICEKEEL_CLIENT_ID,
  redirect_uri: redirectUri, // Must exactly match the registered callback.
  response_type: 'code',
  scope: 'field_service:read field_service:write',
  code_challenge_method: 'S256',
  code_challenge: createHash('sha256').update(verifier).digest('base64url'),
  state,
});
const authorizeUrl = PORTAL_ORIGIN + '/partner/oauth/authorize?' + query;
// Redirect the browser to authorizeUrl.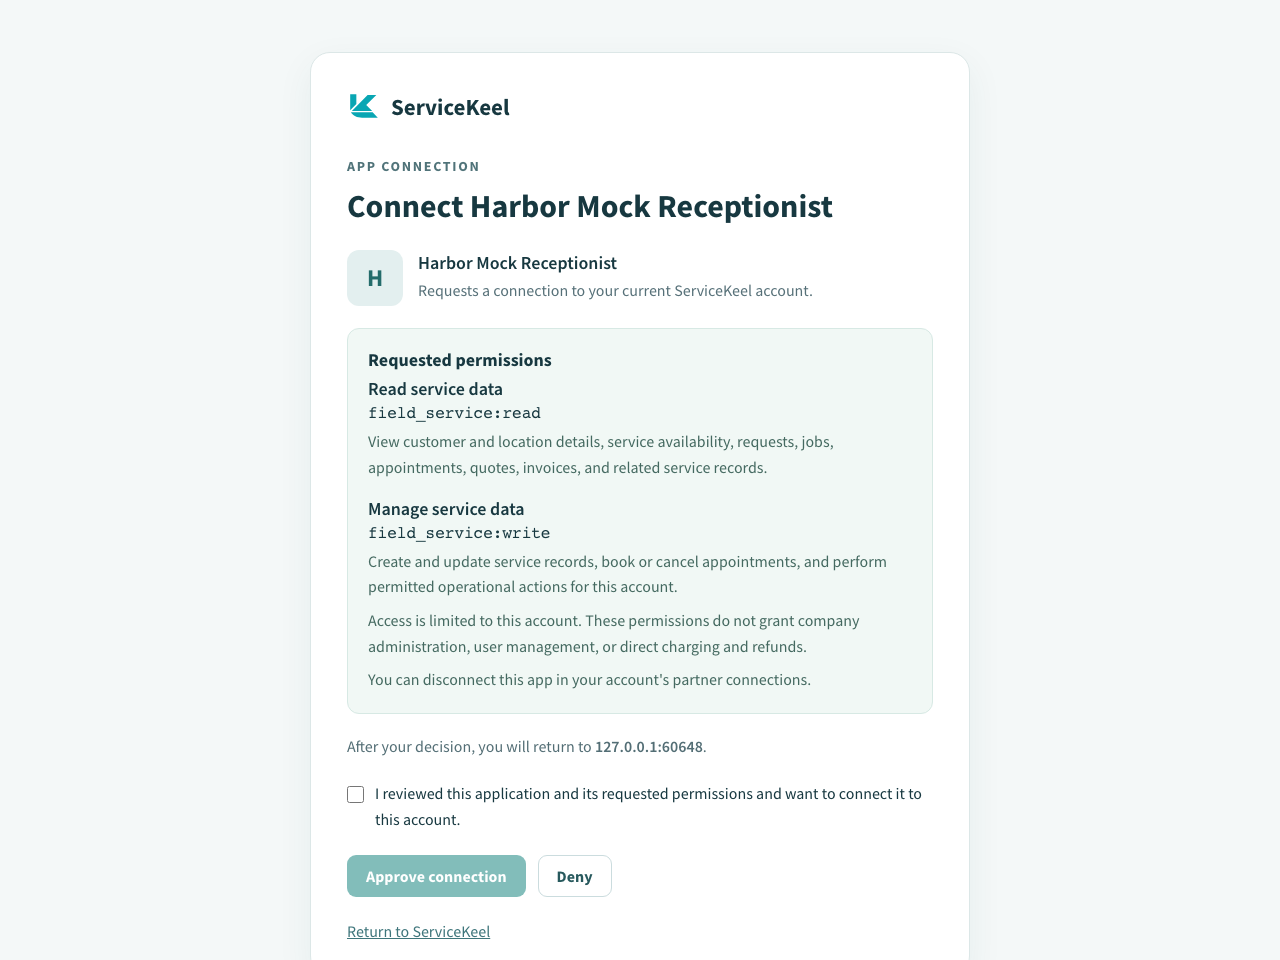
The business chooses whether to authorize the app. Denial returns to your callback without an access token.
Select the image to view it at full size.4. Exchange the returned code
At your callback, validate state against the stored session, reject expired attempts, and consume the state exactly once. Handle error=access_denied without exchanging a code. Only after those checks, exchange the authorization code and original verifier from your server.
Use HTTP Basic client authentication, or the supported form-body credentials used in the demo. Keep the client secret, access token, and refresh token out of browser code, URLs, analytics, and transcripts.
POST/partner/oauth/token
Exchange a partner authorization code or rotate a refresh token
| Name | Location | Type / schema |
|---|---|---|
grant_typerequired | formData | string |
client_id | formData | string |
client_secret | formData | string |
code | formData | string |
redirect_uri | formData | string |
code_verifier | formData | string |
refresh_token | formData | string |
scope | formData | string |
Documented responses: 200 400 401
const response = await fetch(API_ORIGIN + '/partner/oauth/token', {
  method: 'POST',
  headers: { 'Content-Type': 'application/x-www-form-urlencoded' },
  body: new URLSearchParams({
    grant_type: 'authorization_code',
    client_id: process.env.SERVICEKEEL_CLIENT_ID,
    client_secret: process.env.SERVICEKEEL_CLIENT_SECRET,
    redirect_uri: pending.redirectUri,
    code: callbackCode,
    code_verifier: pending.verifier,
  }),
  redirect: 'error',
  signal: AbortSignal.timeout(15000),
});
const tokens = await response.json();
if (!response.ok) throw new Error(tokens.error || 'OAuth exchange failed');
// Encrypt and save tokens under this business's connection.5. Call the API from your application server
The remaining chapters use this helper with paths relative to /field_service. Load connection from your authenticated application session. The token determines the ServiceKeel tenant; a caller-supplied customer or account identifier must never select a different connection.
The following snippets continue the same workflow and reuse returned objects such as customer, job, and visit. IDs and versions must come from API responses.
async function api(method, path, data) {
  const response = await fetch(API_ORIGIN + '/field_service' + path, {
    method,
    headers: {
      Authorization: 'Bearer ' + connection.access_token,
      ...(data === undefined ? {} : { 'Content-Type': 'application/json' }),
    },
    body: data === undefined ? undefined : JSON.stringify(data),
    redirect: 'error',
    signal: AbortSignal.timeout(20000),
  });
  const result = await response.json();
  if (!response.ok) {
    // Let your workflow handle 401, 403, validation errors, and 409 conflicts.
    throw Object.assign(new Error(result.error || 'ServiceKeel request failed'), {
      status: response.status, details: result,
    });
  }
  return result;
}6. Rotate tokens and respect disconnection
Refresh tokens rotate on every use. Serialize refreshes per connection and atomically store the new access and refresh tokens before allowing more requests. Replaying an old refresh token revokes the grant; do not blindly retry a refresh after an uncertain network response.
Refresh cannot add permissions. New scopes require fresh customer consent. A revoked or invalid connection must stop background work and ask the business to reconnect. Never switch to an owner login token as a fallback.
grant_type=refresh_token
client_id=YOUR_CLIENT_ID
client_secret=YOUR_CLIENT_SECRET
refresh_token=CURRENT_REFRESH_TOKEN